The active cooling system of the pi-top [4] keeps the Raspberry Pi at a low temperature in order to maximise the performance of the pi-top. The fan also keeps the pi-top Hub cool so that it can fast charge from the USB-C power supply.
By default, the fan speed is controlled by the pi-top Hub. It takes temperature readings from the Raspberry Pi and from the pi-top Hub so that it can increase its speed at the right times. However, you can control the speed of the fan yourself by connecting it to a secondary fan connector.
The active cooling system of the pi-top [4] is designed to maximise the power efficiency of the Raspberry Pi 4B and the charging efficiency of the pi-top [4]. Therefore we always recommend allowing the pi-top Hub to have control over the fan speed.
How to control the speed of the fan
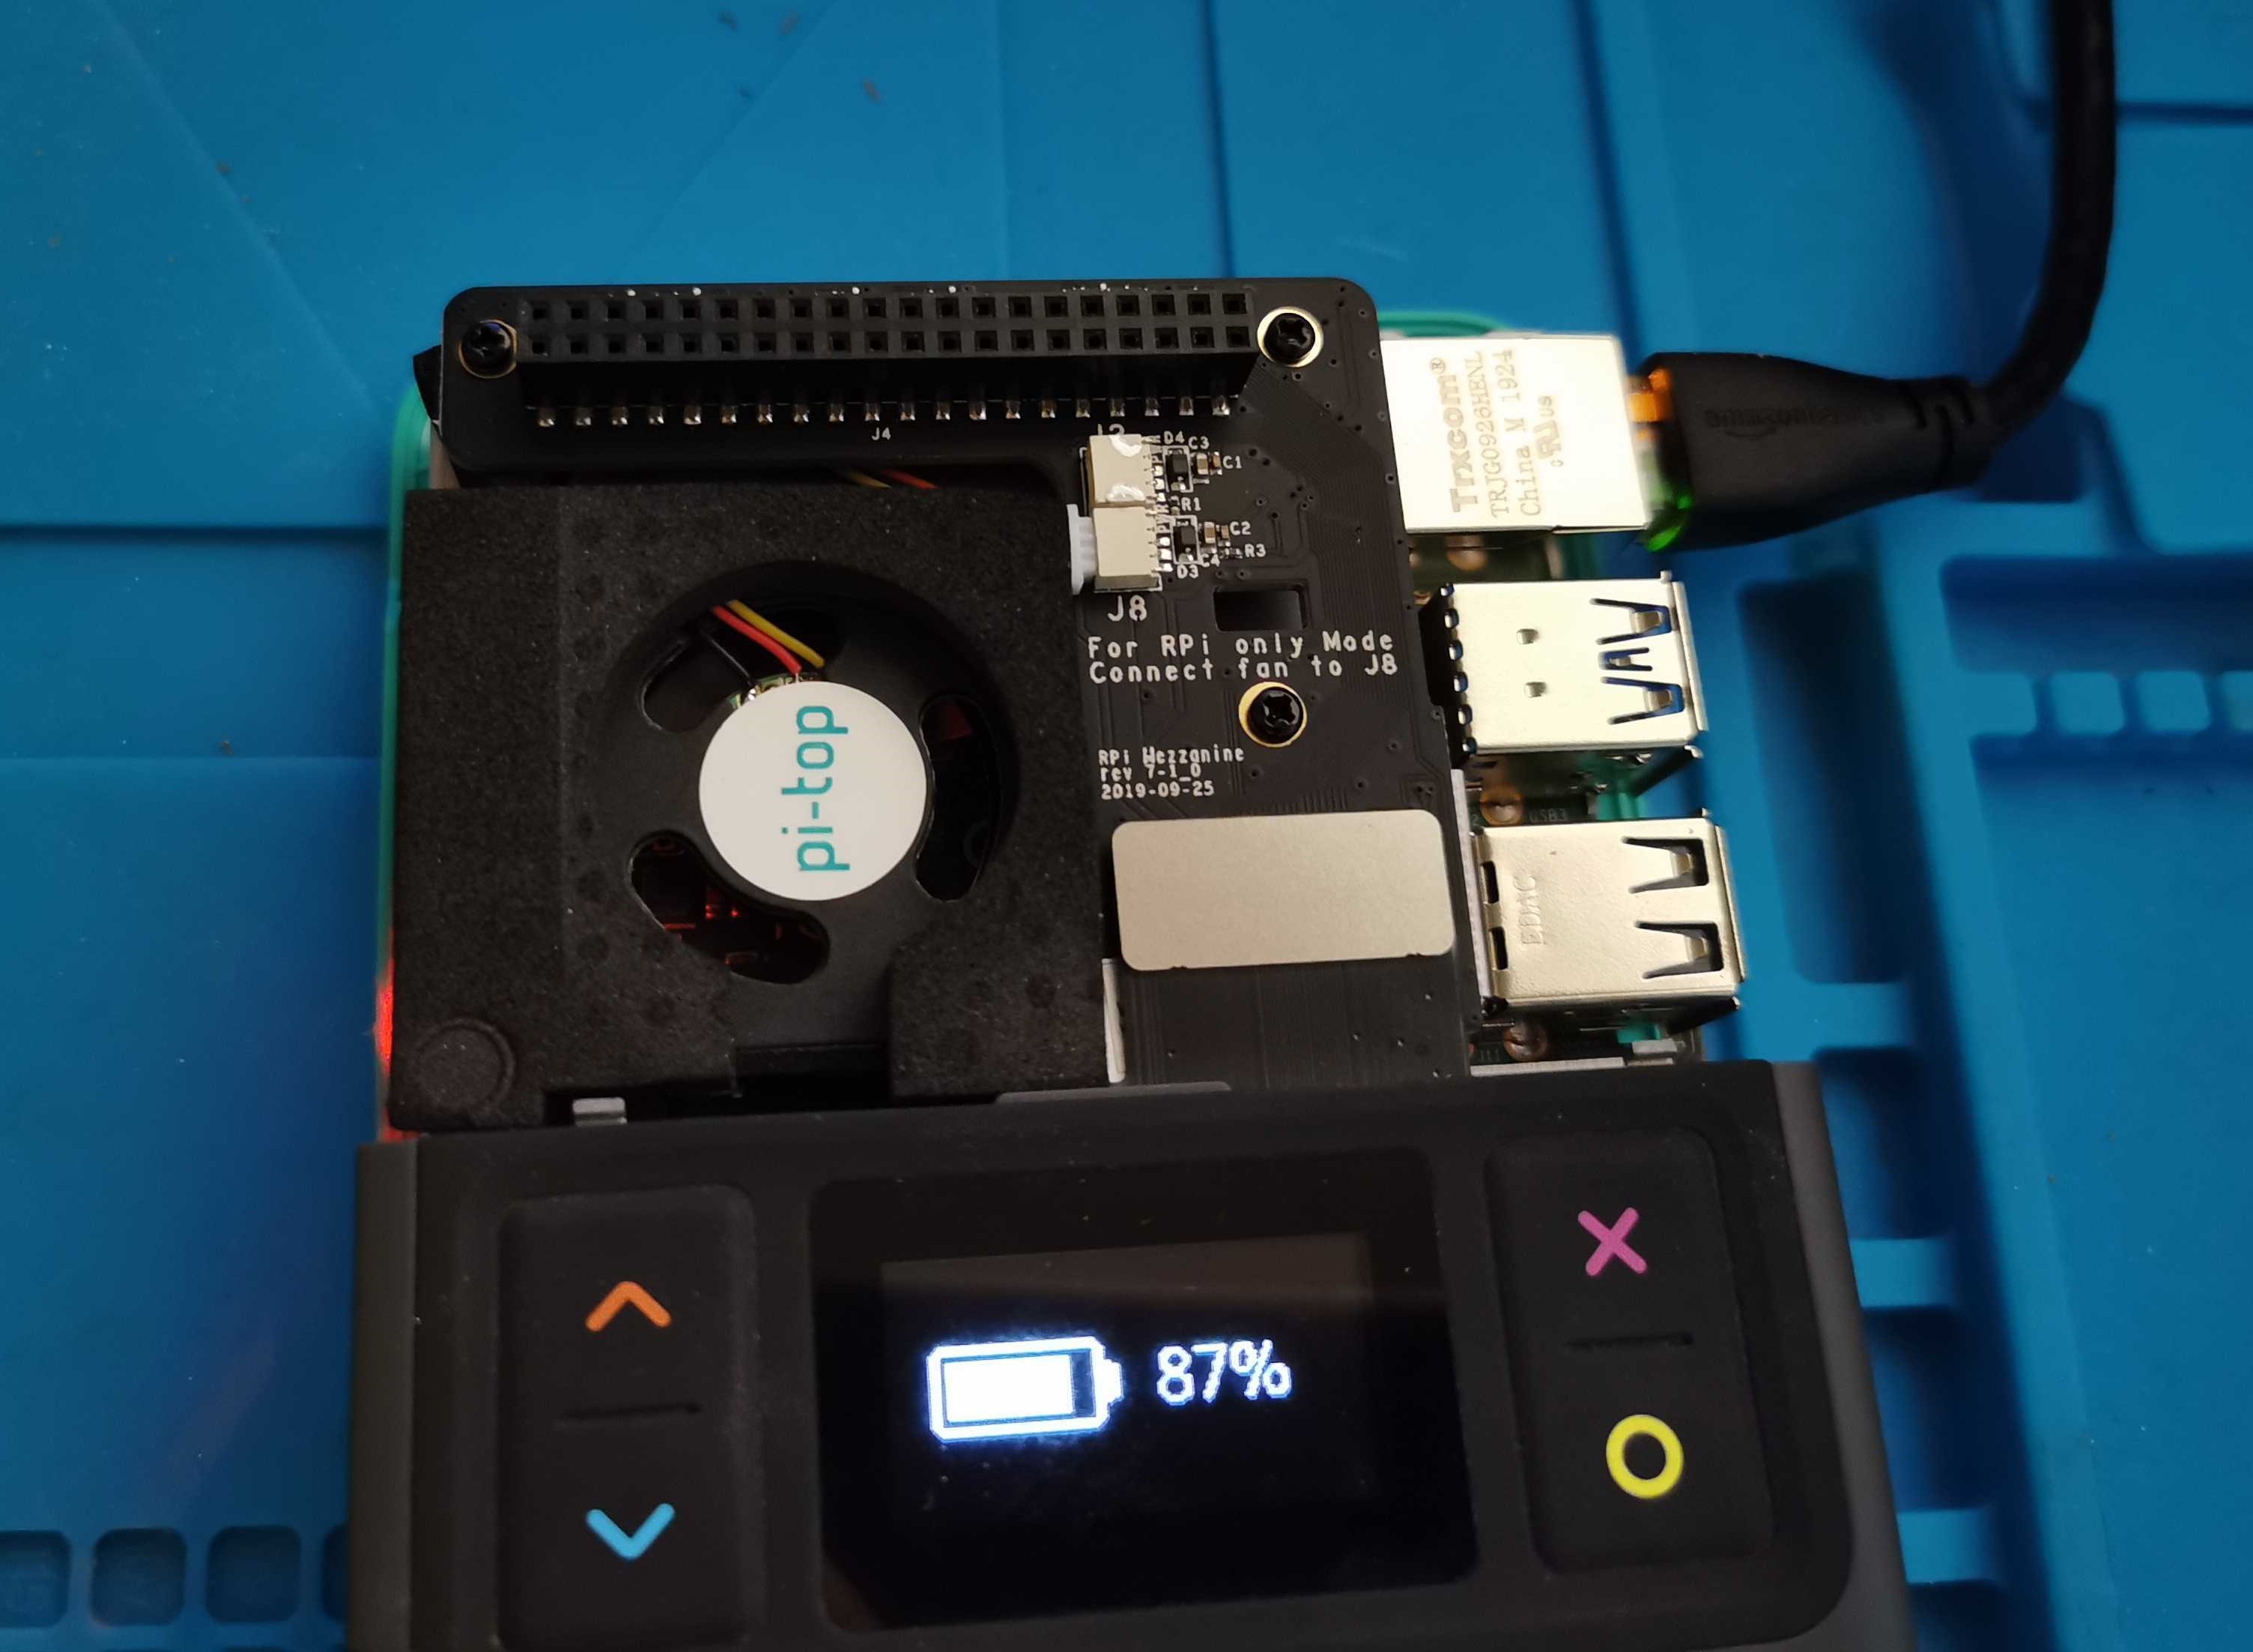
The two fan connectors on the pi-top Mezzanine board are shown in the image below. The silkscreen explains which connector to attach to and labels the connector as well. The best thing to do is use tweezers, otherwise you may have to remove the foam in order to get access to the fan connector.
You will have to remove the warranty void sticker that covers the connector J2 to unplug the fan cable and then connect it to J8. Do this while the device is turned off.
Once connected, power up the device and open a command line. This fix uses WiringPi. WiringPi has been preinstalled on the Raspbian for years but there is a fix required for running it on the Raspberry Pi 4B.
cd /tmp
wget https://project-downloads.drogon.net/wiringpi-latest.deb
sudo dpkg -i wiringpi-latest.deb
To test everything was installed correctly, run the command:
gpio readall
To get a status of all the GPIOs status:
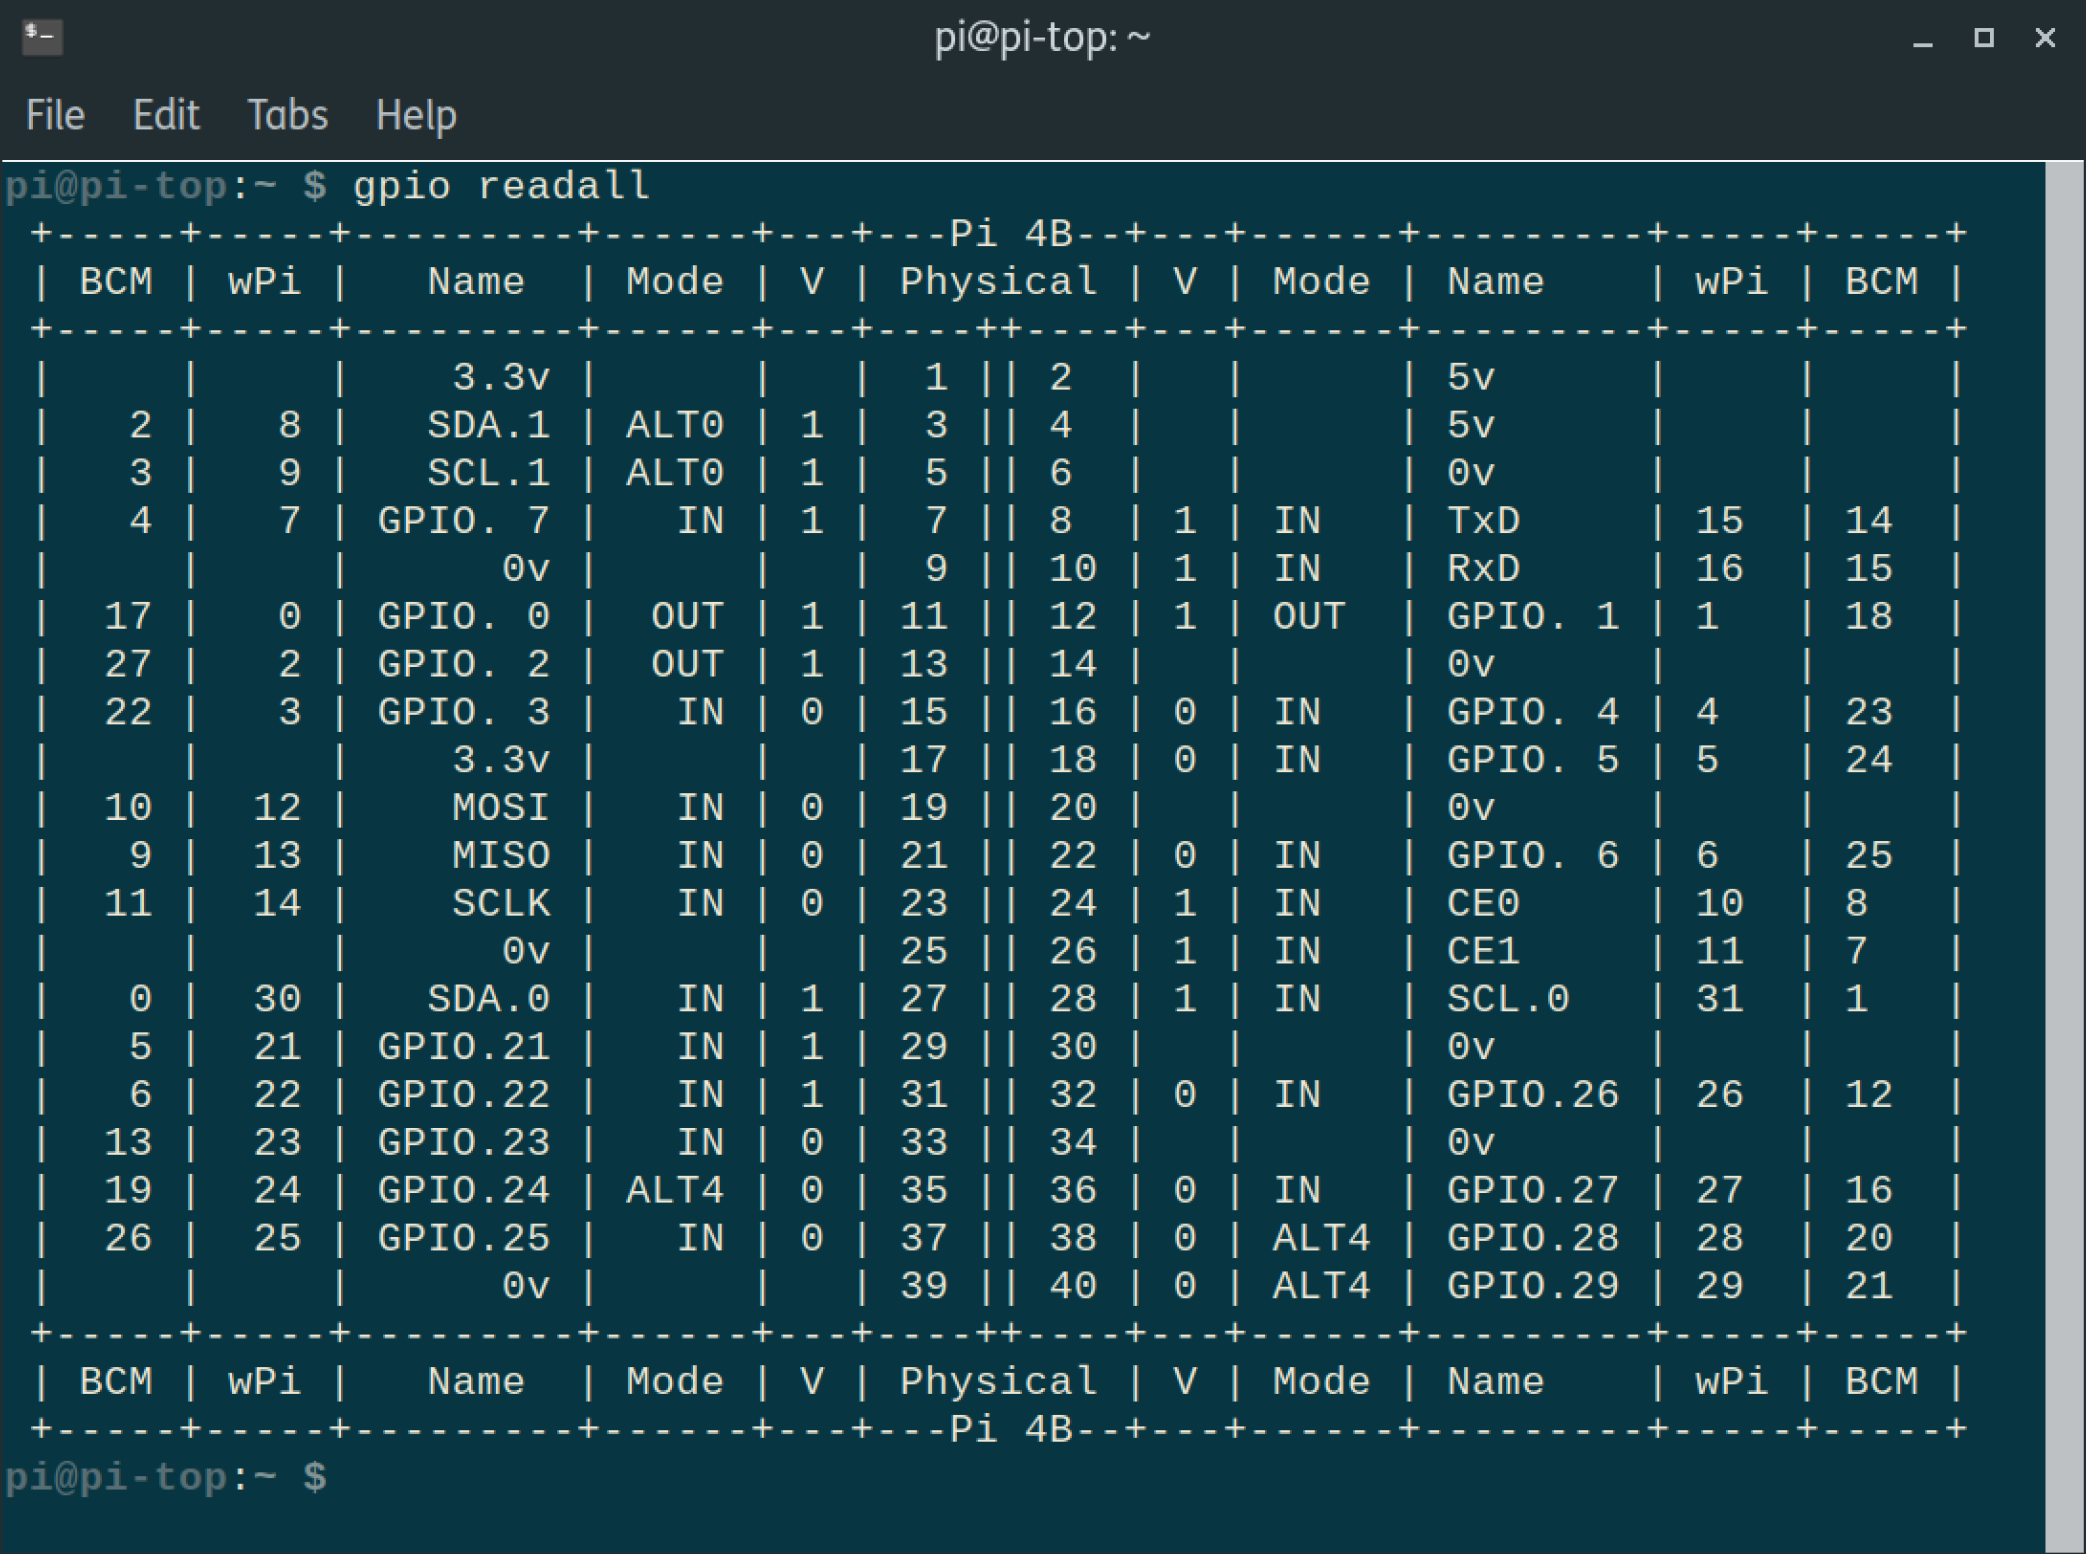
The table mostly just shows the status of the digital pins. If you're using any alternate functions such as I2C or SPI then the relevant pins will tell you the Mode as the relevant alternative function. If you want to learn more about this, head on over to pinout.xyz.
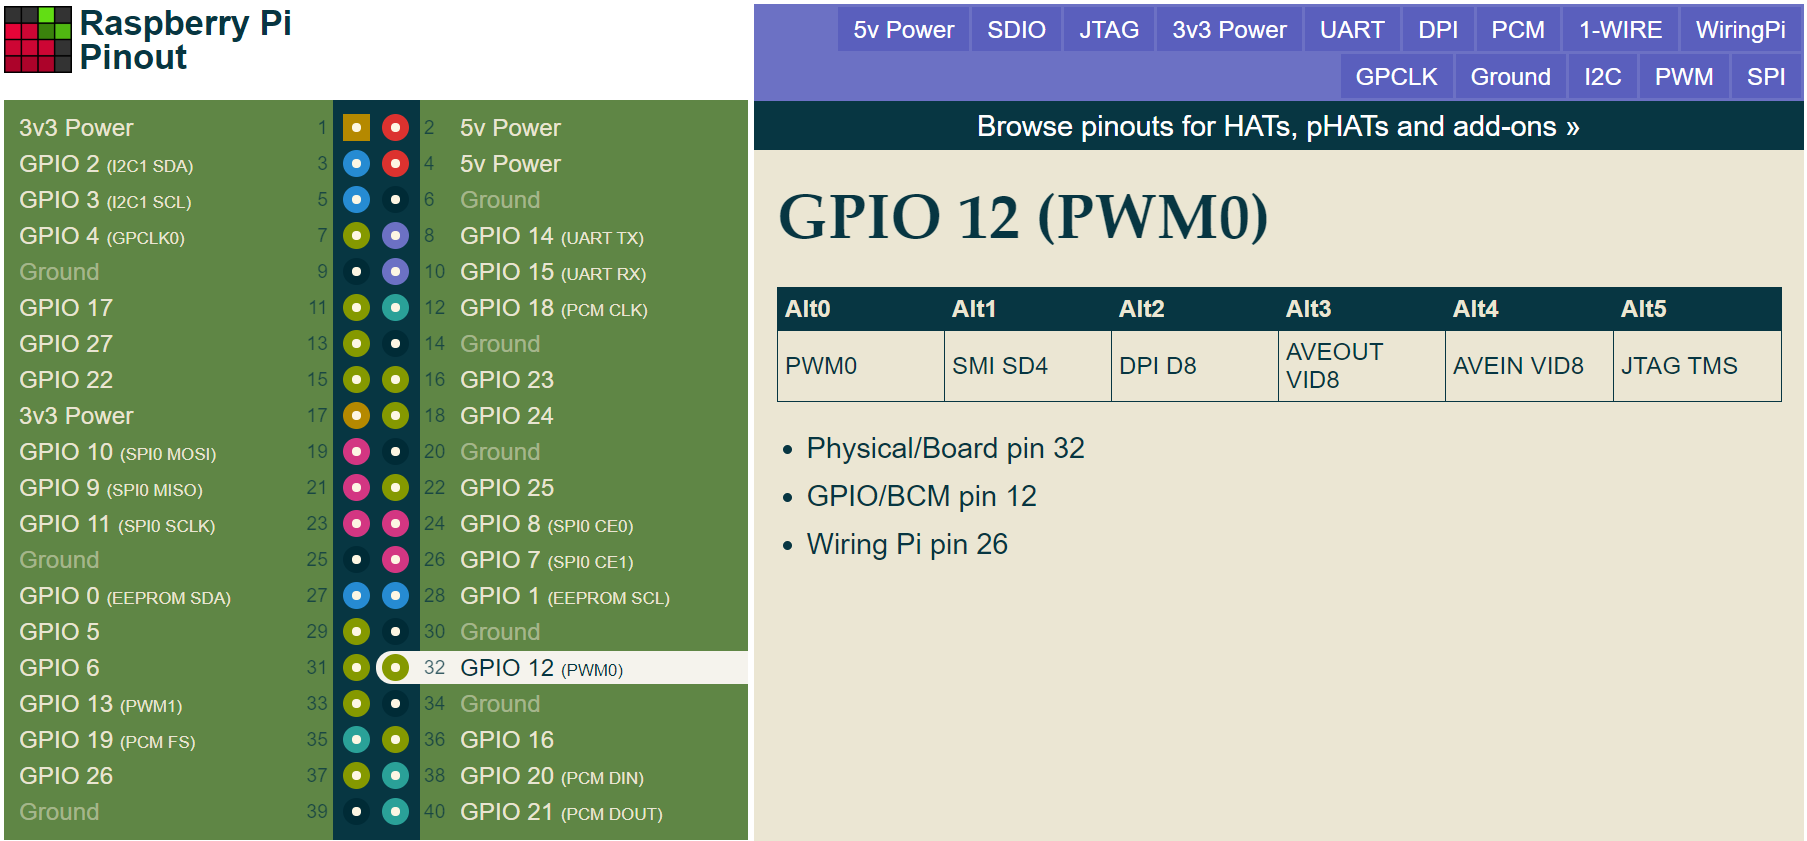
In our case, the fan PWM control is connected to BCM pin 12/WiringPi pin 26/Physical pin 32. You can see it highlighted in the table below from pinout.xyz. The alternative function is listed as PWM which is perfect for controlling the speed of a fan.
The five lines of code to get the fan running need to be typed line by line into the command line. Execute each one individually.
gpio mode 26 pwm   #Configures WiringPi pin 26 (GPIO 12) to a PWM pin
gpio pwm-ms   #Configure the pwm signal to be in mark-space mode
gpio pwmc 22   #Change the PWM Clock Divider to 22
gpio pwmr 100   #Change the PWM Duty Cycle Range to be 0-100
gpio pwm 26 100   #Turn on the fan to maximum duty cycle @ 100
And that's it! The downside of this is that everytime you turn on the pi-top, you'll have to rerun the commands to get the fan spinning.
We're planning to release a firmware update that will allow users to choose between fast charging (the current default) and regular charging to reduce the heat generated by the pi-top [4] and therefore reduce the fan speed during charging (Sept 2020).