If you are having trouble using the pi-top USB cable or an ethernet to USB cable to make a connection to your pi-top from a Windows PC you may need to install these drivers.
Do you have the correct drivers installed for Windows?
In some cases Windows PCs may not have the required drivers for this type of connection installed by default. In this case you need to install the drivers yourself, which should only take a few minutes.
Below the are two guides, one for Windows 11 and another for Windows 10 and earlier. Alternative methods may be found here: https://www.windowscentral.com/how-install-device-drivers-manually-windows-11.
Windows 11:
- Download the drivers from this link: RNDIS Ethernet Gadget Driver.
- Open the file explorer, find the downloaded file mod-duo-rndis.zip and 'Extract All' the files.
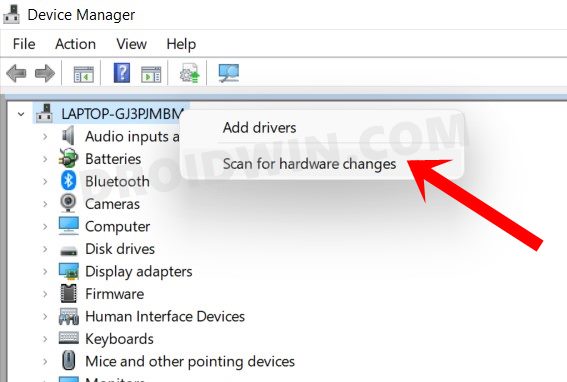
- Open the Windows Device Manager (search for this or find in Control Panel).
- Right click the computer name at the top of the device list, and select 'Add drivers'

- Select the extracted folder to install the files and click Next.

- Once you've done that, you should have a new device installed under 'Network Adapters' called RNDIS/Ethernet Gadget.
Windows 10 and Earlier Versions
- Download the drivers from this link: RNDIS Ethernet Gadget Driver.
- Open the file explorer, find the downloaded file mod-duo-rndis.zip and 'Extract All' the files.
- Open the Windows Device Manager (in Control Panel )and connect your pi-top to your PC using the cable.
- Right-click on the device under 'Ports' and click "Update Driver Software..."

-
Select ‘Browse my computer for driver software’.

- Select the extracted folder to install the files and click Next

- Once you've done that, you should have a new device installed under 'Network Adapters' called RNDIS/Ethernet Gadget.