Here's a quick start guide to create a class.
Why should I use Classes?
Add lessons for students to do: Once you have added a class and students you are able to assign lessons and courses to the class, this means students will easily be able to find the lessons through their dashboard.
Easily let students work in groups: When students start their work through a class they will be asked who they are working with, allowing groups of students to work together with all students in the group having access to their work.
Track student progress: On the class page you are able to see how far students are through a particular lesson and whether they have submitted their work as completed.
Grade students: Mark their work with a grade and easily access what grade you have given through the class overview.
What do I need to do first?
Create a School: Before adding classes, ensure that you have already created a school. If you haven't, you may want to read How do I create my School?
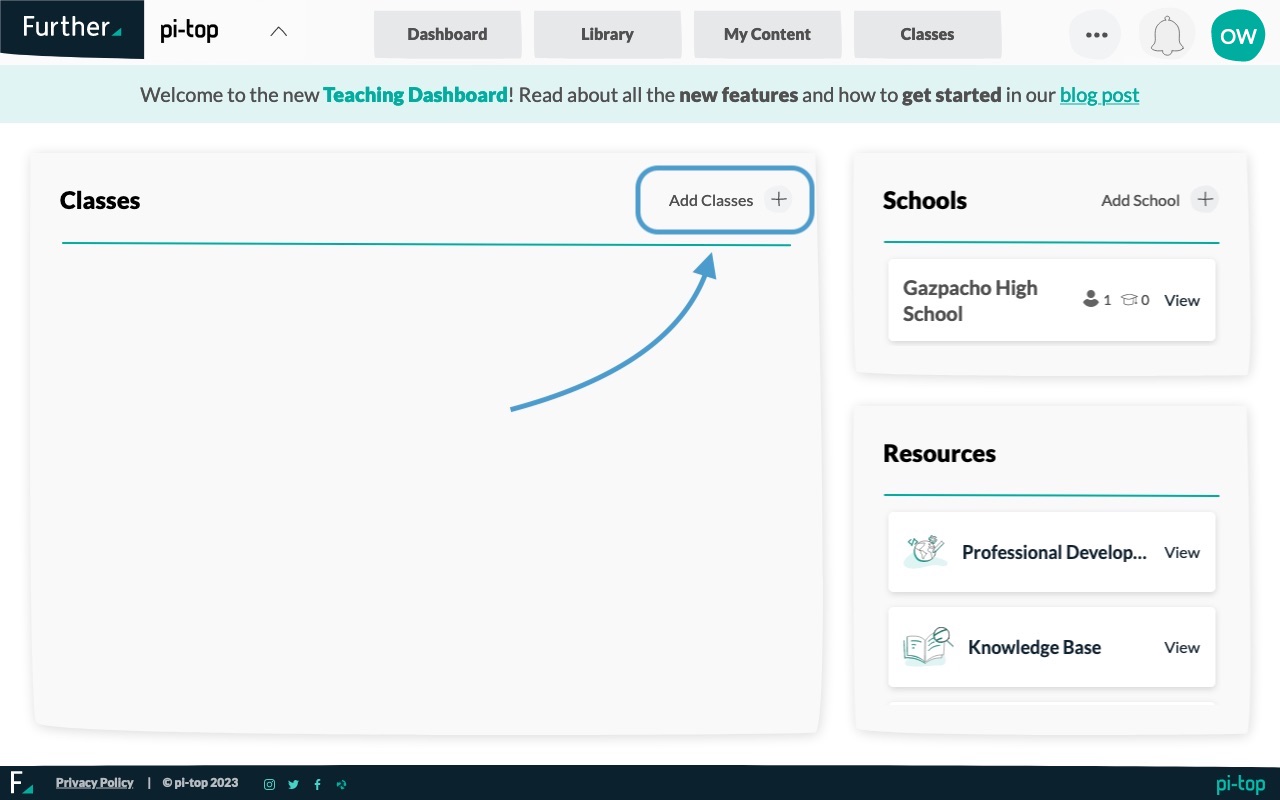
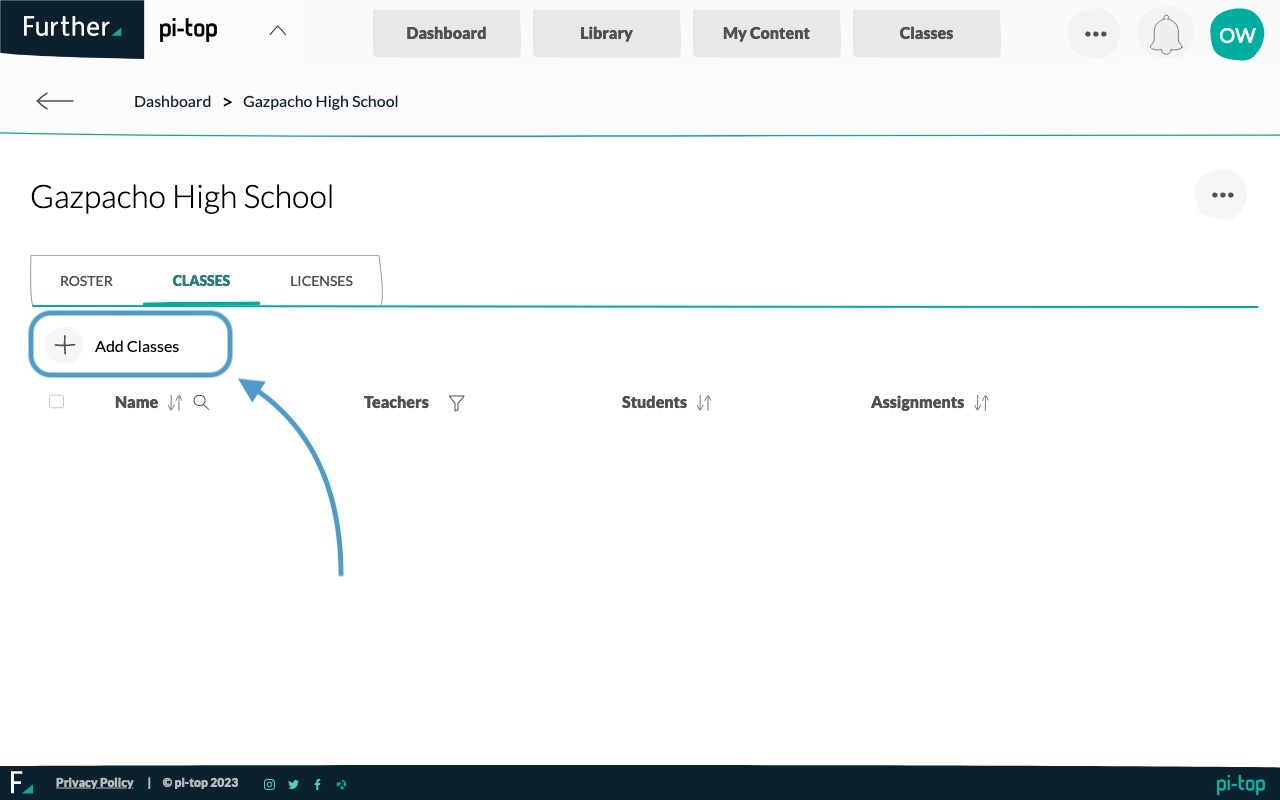
Where to Add Classes from
- Dashboard: You can add classes in the top right of the Classes area:
- School Page: You can add classes under the Classes tab:
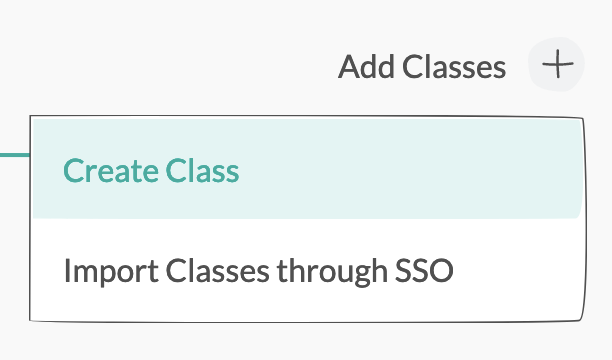
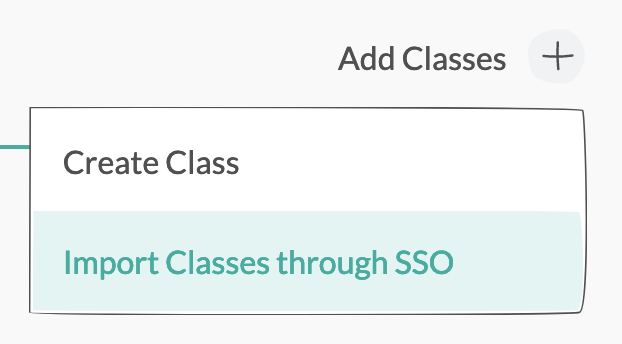
Adding Class Options
Clicking the "Add Classes" button will open a menu with two options:
- Create Class: Use this option when you want to manually create an empty class.
- Import Classes through SSO: Use this option if you have classes in Google Classroom or Clever that you want to import. All the students and teachers in the external class will be automatically added to your School, this really speeds up rostering! You can learn how to link Google Classroom or Clever here: How do I link Google Classroom or Clever to my Account?
Creating a Class Manually
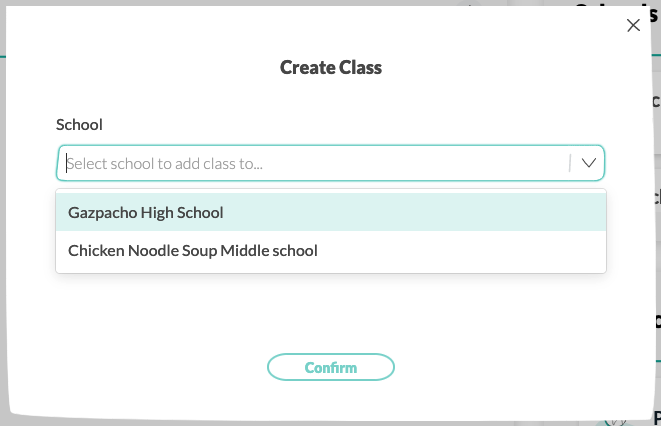
Select Your School: Once you click the "Create Class" option a dialog will show up. If you have multiple schools associated with your account, make sure to choose the correct school using the dropdown at the top of the dialog. If you only have one school it should be automatically selected.
Enter Your Class Name: type the class name into the "Class Name" input. After entering the name
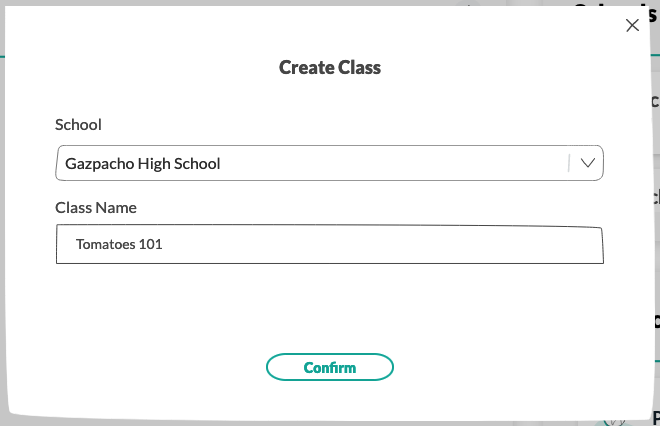
Click the Confirm button: After you click the Confirm button you will be redirected to the new Class.
Importing Classes
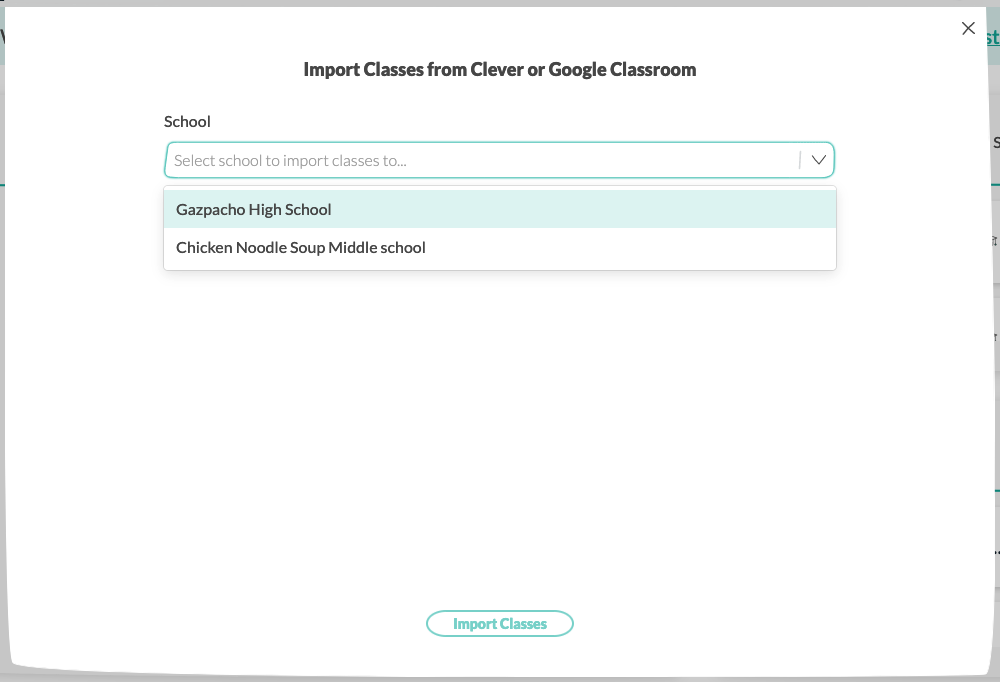
Select Your School: Once you click the "Import Classes through SSO" option a dialog will show up. If you have multiple schools associated with your account, make sure to choose the correct school using the dropdown at the top of the dialog. If you only have one school it should be automatically selected.
Select Classes to Import: Your Google Classroom or Clever classes will be displayed in the list below the school. Check the classes you want to import into your school
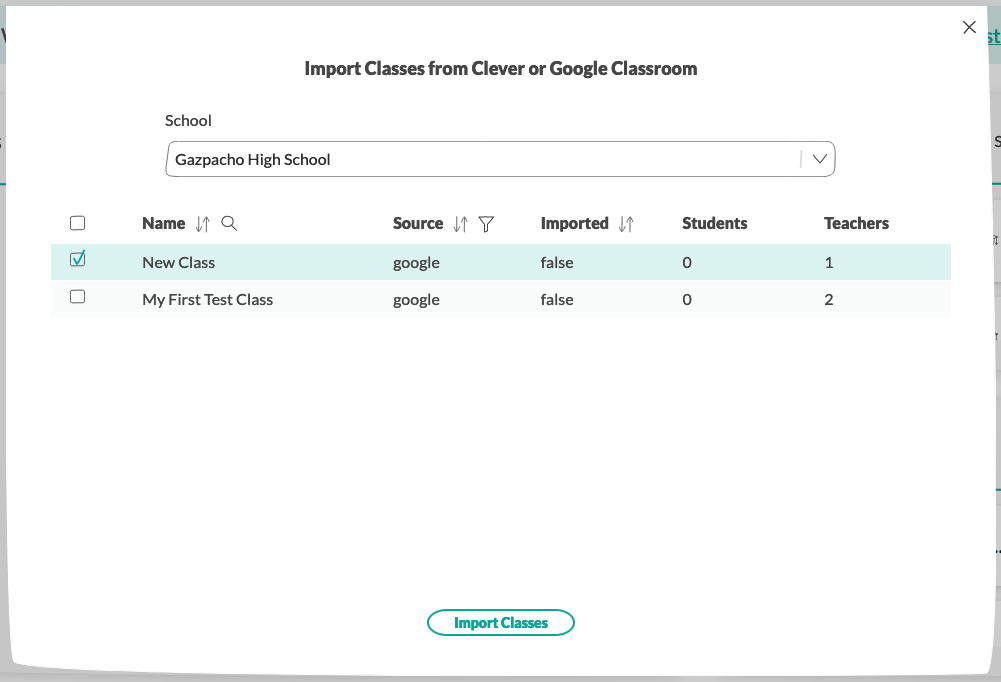
Click Import Classes button: After you click the Import Classes button the dialog will close and your imported classes will show up in your list of classes.
How do my students get access to the class?: Your students can now access Further by logging in with Google or Clever, the classes they are in will be shown on their Dashboard.
What to do next
Now that you have created your class you might want to do a number of things.
Add students to your class: If you have imported using Google Classroom or Clever you can skip this as your students will already be in your class! You can learn how to add students in this article: How do I add students to my Class?
Add lessons to your class: Adding lessons will make it easy for your students to find the work they need to do, and allows you to track their progress. You can learn how to add lessons in this article: How do I add lessons to my Class?