How do I add students & teachers as members of my School?
Learn how to roster students to your school, and add teacher and admin members.
Quick Start Guide
Here is a one-page overview guide to adding members to a school.
Why should I add members to my School?
Give colleagues and students access to premium content: School members can gain access to premium content you have licensed for your school.
Manage your student's accounts: Students added to your school can be managed from your school, for example resetting your students password if they forget it.
Add school students to your class: Adding students to your class is as easy as picking them from a list of your school students.
What do I need to do first?
Sign up: You must sign up or log in to access the pages mentioned in this article.
Create your School: You must have created a school to add members to, learn how to from this article: How do I create my School?
What are my options for adding members?
Import from Google Classroom or Clever: If you use Google Classroom or Clever you can automatically import classes from there, this will automatically add members to your school. Learn more here: How do I add classes to my School?
Add members by CSV: If you have a spreadsheet of your students you may be able to import them by using a CSV file. The CSV may have the students email, name or Further username.
Add members by email: You can add a member by their email manually. If the member does not already have an account on Further then we'll create one for them and send an email with instructions for how to access their account.
Add members by username: You can add a member by their username manually also. In this case the member must already have an account on Further, we can not generate an account using a username.
Add students by name: This is the best option if you want anonymous accounts for your students. We will generate accounts based on the name you give us, you can manage the passwords for these accounts yourself.
Using a Class Join Code: An alternative to directly adding students to the school is to create a class and then share the join code with students. When they enter this code on their Dashboard they will join the school as well as the class.
Where do I add members to my school?
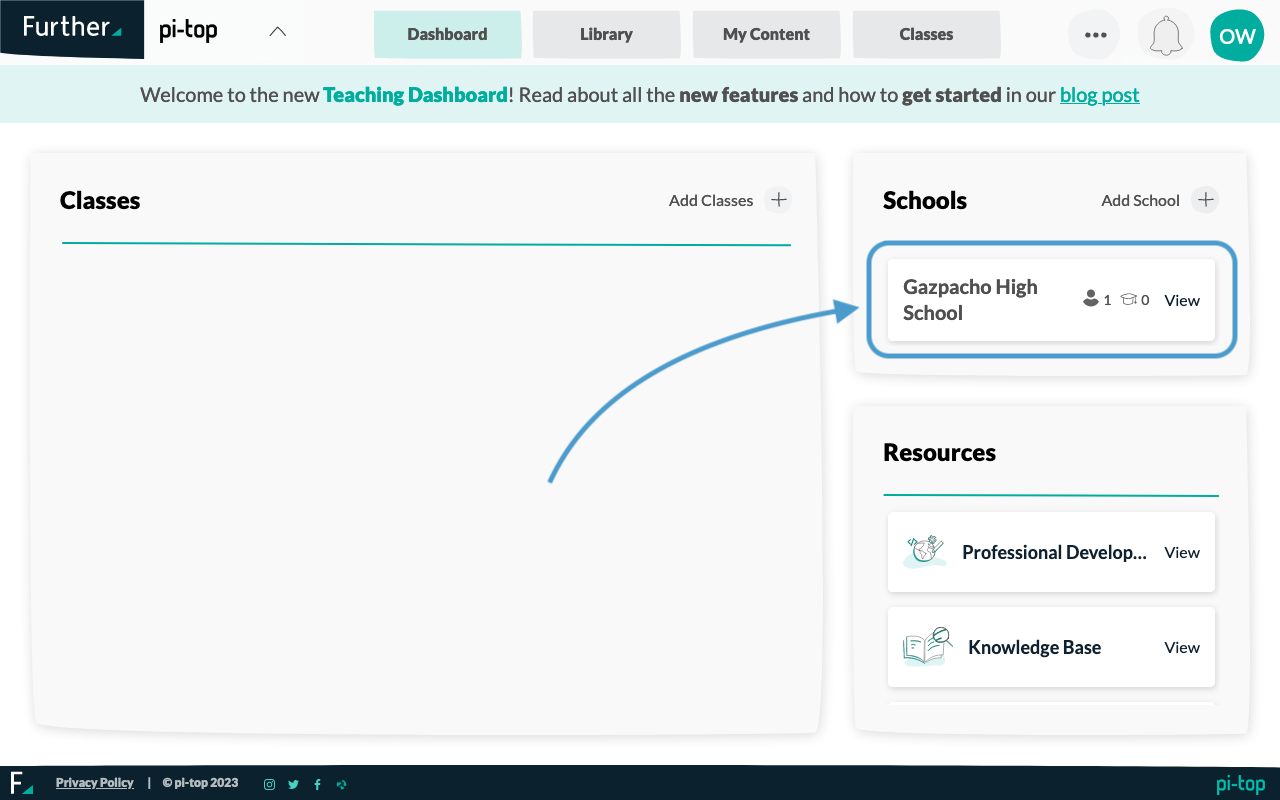
Open the School page: You can find your school in the Schools section in the Dashboard tab

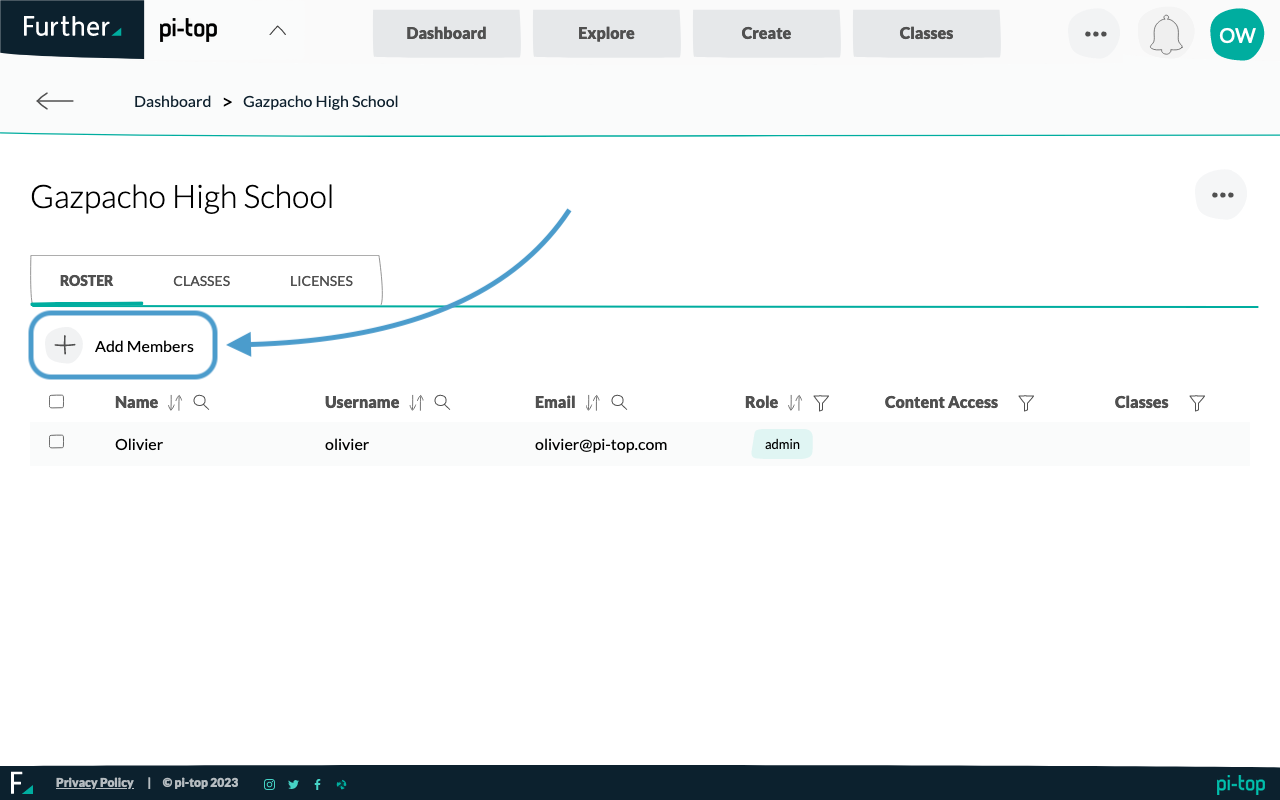
Click the Add Members button: The School page should open showing the "Roster" tab, on this tab there is an "Add Members" button

Adding Members Manually
After clicking the Add Members button a dialog should be opened. To add a member:
Click the Add Member button: This will add a new row to the list of members to add.
Choose the member role: If you are adding a teacher or admin, change the dropdown in the first column to select the appropriate role.
Choose how to add the member: The second column of the table is labelled "Add By" with a dropdown that gives three options: "Email", "Username" and "Name". The differences between these three options is outline in the What are my options for adding members? section above.
Enter the member's information: If you chose to add by email, type the member's email into the "Member Info" column. If you chose to add by username, type the member's username into the info column. If you chose to add by name, type the member's name into the column.
Use the Add Member button again to add multiple members: To add multiple members at once you can click the "Add Member" button again to add another row to the table. You can mix and match all the types of "Role" and "Add By" options.
Click the Confirm button: Once you have finished adding member information to the table you can click the Confirm button to add all the members to the school at once.
Adding Members by CSV
After clicking the Add Members button a dialog should be opened.
Click the "CSV" tab: This will open the correct area of the dialog

Prepare your CSV file: The CSV file can have a number of formats, we have a number of templates that explain the supported formats:
- Import students by email Template
- Import students by name Template
- Import teachers and students by email Template
- Import using all options Template
You can open the templates in software such as Microsoft Excel or Google Sheets.
Once you have prepared your spreadsheet with your student (or teacher) information you should export it as a CSV file. Typically you are able to export a CSV from software such as Microsoft Excel or Google Sheets.
Drop the CSV file onto the dropzone: Take the CSV file you exported and drag it onto the dropzone in the dialog. Once the file is dropped we'll show you what we could read from the file.

Edit the information (optional): You are still able to edit what was in the file in the dialog in the same way as explained in the "Adding Members Manually" section below.

Click the Confirm button: Once you have finished editing the member information in the table you can click the Confirm button to add all the members to the school at once.
What to do next?
Now that you have added members to your school you may want to:
- Assign places on a limited license: How do I give premium content access to members of my School?
- Add classes to your school: How do I add classes to my School?
- Add students to your class: How do I add students to my Class?